Why Draw Fish?
I own a couple of fishing websites, so I have always been in the market for fishing pictures and graphic illustrations of fish. However, I have not been able to find excellent fish identification photos for many of the fish around our home in Florida.
So, I figured why not try to draw my own fish? I started this last week using the iPad Pro M1 with Procreate software. I have to say that it has been more difficult than I could have imagined. The shape of a fish is essential to get right in order to be able to identify the fish as the right species.
I’ll add a photo of the fish I’m drawing now, a menhaden (bunker) baitfish. I finally got the body shape right and just starting to fill in the details.
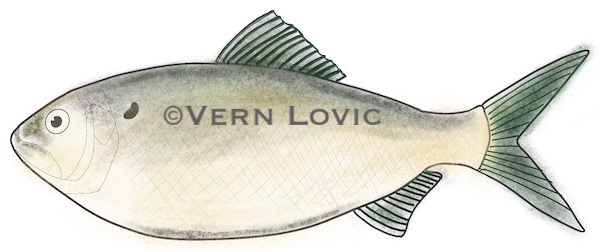
Obviously, there are some problems with this menhaden fish above that I’m working on. The lines I used for the fins are too bold. I will have to go over them with a lighter color. The crosshatch may not work well as scales, I may have to ‘invert’ that layer and see how much that helps. I do like the general coloration but it is too severe of a contrast at the tail.
I have to add a couple of more fins to the fish, so it can swim. I have to edit the outline of the drawing to remove all the overshot spray paint!
So anyway, you can see that this is how it goes. Try something, and see if it works. If not, revise and see if it works!
So, it has been challenging but I have learned a lot of tips I want to share with you if you are also going to start drawing fish on the iPad.
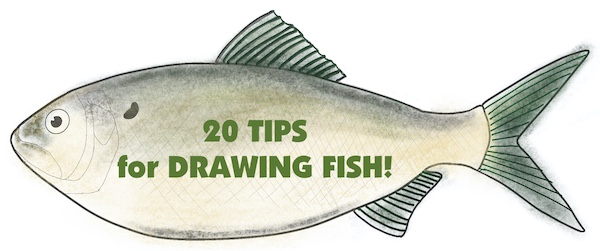
Here Are 20 of the Best Tips for Drawing Fish on the iPad with Procreate!
20 Tips for Drawing Fish in Procreate
- Study Fish Anatomy! Before you start drawing, take some time to look over and study the anatomy of the fish you want to draw. Google image search and pull up many different photos of the fish. Use the images/type section to pull up line drawings and clipart.
Those can simplify your drawing so you don’t get carried away in the details. For instance, the scales. I haven’t drawn scales on my fish yet and I’m not looking forward to it to be honest! Pay attention to the shape and proportion of the body, as well as the placement and size of the fins and tail. - Observe Real Fish. If you can go see fish in an aquarium or in a video, it might help. Remember, there are lots of color variations for fish in the wild and it might be necessary to study fish only from your area. It can be helpful to observe real fish in their natural habitat or to study photos and videos of them. This may give you a better sense of how they move and what their features look like in different lighting and angles.
- Use Reference Images. I’ve fished for decades, but I can’t draw fish without looking at a reference image. The shapes are just too precise for me to remember. Maybe that changes over time? Even if you’re drawing from imagination, having reference images on hand can be helpful for getting the details right. Look for images that show the fish from multiple angles and in different lighting conditions.
- Sketch with Basic Shapes First. When first sketching out the fish, start with basic shapes to get the overall structure and proportions in place. For instance, oval for the body. Triangle for the head. Triangle for the tail. Triangles for the side fins. Rectangles for the dorsal and anal fins. Then get the shapes perfect (with another layer). From there, you can add details like the individual barbs in the fins and tail.
- Get the Shading Right! Shading can help give your fish drawing on the iPad dimension and depth. Study the way light falls on different parts of the fish and use shading techniques to create the illusion of texture and form.
- Experiment! Don’t be afraid to try something different. If you’re going for a characterization of a fish, but it doesn’t need to be exact, you can exaggerate something or change the colors. Make it cool-looking. Experiment with different styles and techniques. Try using different brushes for some of your lines and see how it affects the dynamic.
- Use Layers. When drawing with Procreate, use layers to keep different parts of the drawing separate. This will make it easier to adjust and edit different elements of the drawing without affecting the whole thing. If you ever need to erase a complicated line because it isn’t perfect, add a layer and redraw over the old line, using it for reference to draw your new, better line. Then go back to the original layer and remove the old one. Then merge the layers and it’s all part of your same layer now with the redrawn line.
- Try Different Brushes. Procreate comes with a variety of brushes that you can use to create different textures and effects. Experiment with different brushes to see which ones work best for creating scales, fins, and other details. For drawing the outline of the fish I use the Baskerville pen and I make a copy of it. I revise the copy so I don’t have any fading lines at the end of the stroke. It just always makes a line of the same thickness. This may keep you from going mad!
- Copy? If you aren’t going to publish your fish drawing/art as your own work, and you are just going to use it for your own purposes, you can import a copy of the reference image and trace over it to get the shapes right. It’s a great help for drawing fish quickly. Of course, you’re copying directly someone’s image so there are copyright issues if you don’t change a lot of stuff. Just keep it in mind as a very fast way to draw fish. Import a copy on a new layer. Make a new layer overtop to trace it. Remove the reference image layer and you have a good drawing.
- Use Symmetry Tools. If the drawing you’re making of the fish is at an angle (head-on) where there is a symmetry to the fish, you can use the tools in Procreate that help you make symmetrical drawings. It’s SUPER helpful! This can be helpful when drawing fish that have a symmetrical body shape, such as a flounder.
- Grid It! Procreate has a grid feature that you can turn on to help you create accurate proportions and angles in your drawing. It really helps you see the proportions of tail height and length to the length of the body, or length of the body to thickness (width) of the body, etc.
- Color Palette. Either copy a color palette or create your own and make sure you use the same values for the same things. Fins for instance. Shadows/shading for instance. Speckled areas for instance.
- Selection Tool. You can choose parts of your drawing and move them if they’re not placed correctly. This can save heaps of time. It is very helpful to reposition a fin, eyeball, or other element of your fish art.
- Color Picker. You can get your color palette from your reference image if you import the image and use the color picker to choose the colors there. Again, you’re brushing up against copyright issues because your drawing may be too similar to someone else’s, but make sure to change the colors slightly to make the fish drawing your own.
- Eraser Tool. Part of why I use the iPad and Procreate is that the eraser tool is PERFECT. You erase completely, not just partially. You can erase hundreds of times until you get something perfect. For perfectionists, it’s quite useful! The eraser tool can be helpful for cleaning up stray lines or for creating texture in areas like scales.
- Zoom In! Get to the real details by zooming in and working on them. When you zoom back out, it looks amazing. This is also another great reason why you should embrace the iPad and Procreate for your artwork. Zoom is super-helpful in cleaning up an image and can be the difference between pro and amateur work. Make sure to use the pinch gesture to zoom in on your drawing and add fine details like scales, shadows, and texture.
- Smudge It! The smudge tool can be used to blend colors together and create a more natural-looking texture. It can help you with shading and with unique effects.
- Layers Add Depth. Use layers to create depth in your drawing by placing elements like the fins and tail on separate layers and adjusting their opacity. Layers can be edited individually anytime which makes editing limitless.
- Import Textures? Use reference images for color and texture. You can import other photos that show scales well and put them as a lightly saturated layer on your image. Then add a new layer and trace the scales. This can make scale work so much easier than trying to draw the fine-scale details yourself.
- Practice, Practice, Practice! As with any skill, the more you practice, the better you’ll get. Don’t be afraid to experiment and try new things to improve your fish drawing skills. Sometimes I like to choose the most difficult thing I can possibly draw and just try it. You can sometimes do better than you think, and this gives you tremendous confidence to do simpler art projects!
- Bonus! Draw fish with simple patterns and colors. When I drew the Orca Killer Whale I didn’t realize that once the basic and very odd shape was drawn, the rest was easy because it’s black and white and simple shapes. No scales! No color gradation!
Drawing fish is difficult and yet the sense of accomplishment one feels as the drawing is finished is immense. Hard subjects are like that. My favorite drawing/artwork so far is a banana tree in our backyard. WOW. Difficult! Harder than fish!
If you want to send me the art you created of a fish, do it! Contact me at the About page in the links at the top of the page.
See how I drew a Remora Fish here, dolphins, and some Sharks here.